Getting started in Blender can be overwhelming to say the least. It’s best to start with something simple to get some easy wins then moving on to more complex projects.Today we will be taking in-depth look at making of a basic head model using Blender. This should serve as your primary stepping stone into creating wonderful character models as you venture further into the creative world of Blender.
Easiest way to make a simple head in Blender is by utilizing the sculpting mode to manilpute a basic sphere shape. Then, using tools such as grab brush, snake hook, scrape brush, smooth brush add other features such as month ears and neck.
Be sure to stay tuned with me as I guide you through a step-by-step process on how to create your first-ever basic head model.
Making A Base For Your Model Head

There are a lot of ways to do this, but in this case, I will be using a sphere mesh. Practicing a lot with a sphere mesh as your base for sculpting will be a good way to hone your skillset with Blender.
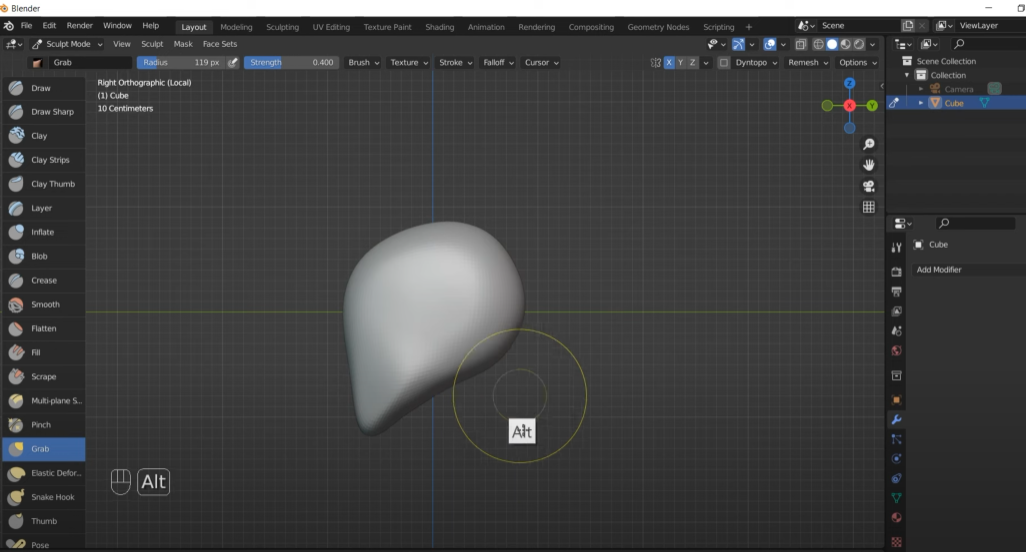
Use a grab brush and slowly form the back of the head of your model. You can start off with a very edgy draft and then smoothen it later. Your goal here is to just form the back of what is supposed to be the back of the skull for your model.
Feel free to be creative and remember that human skulls are not perfectly symmetric, and it differs in shape from person to person.
Tools Used:
- Sculpting mode
- Grab brush / Snake Hook
- Scrape brush
- Smooth brush
Forming a Chin

Again with the grab brush, form your chin by pulling out the lower front view of your mesh. Sculpting the chin for your head model will depend on a few factors.
Are you aiming for a standard human head? You should make your model’s chin with a normal curve shape with no intense angular shapes, just visualizing what a normal chin is supposed to be like.
Are you making an Anime style head model? Then you should emphasize your chin by making it a bit on the pointy side but not too long and sharp, just making your head’s face smaller, just like in the anime.
Are you making a somewhat cartoon-like model or characters for a game or a model inspired by Pixar and Disney? Simply make your chin less pointy and curvy, making a broad face and putting more emphasis on the sides of the head model.
For now, we will be sticking to a standard human model.
Tools Used:
- Grab brush / Snake Hook
- Scrape brush
- Smooth brush
Creating Jaw Outline
Now you will create an outline for the Jaw. This would give your model a solid skull-like form and it will start to look a bit like a real head.
You have the option to make the jaw broader for a male model, make it stand out on the sides a little bit more, or make it normal. The goal of this step is for you to complete the outline of a skull and also form the shape of your model’s face.

Tools Used:
- Grab brush / Snake Hook
- Scrape brush
- Smooth brush
Adding Presentation To Your Model Head By Adding A Neck
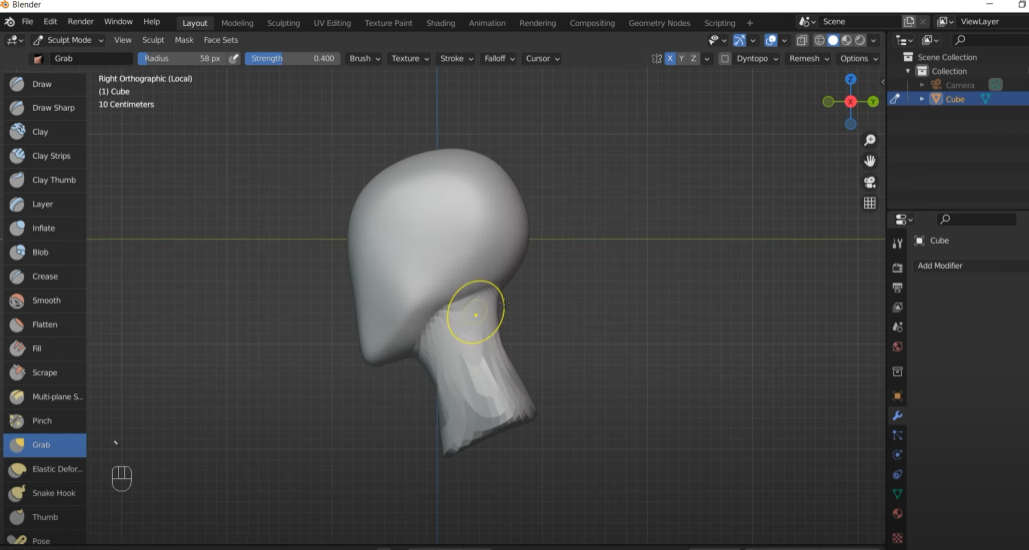
A floating head without a neck would look weird so let’s add some presentation too your model by adding a neck, even if we are just making a simple head model here.
You can start by pulling a cylindrical shape at the bottom base of your mesh and forming a neck. A neck is basically a cylinder shape, but will vary depending on what type of character you are creating.
You can make it thinner, more prolonged, muscular, or shorter. It all depends on you and the kind of character you want to create depending on gender and age.
Tools Used:
- Masking and Reverse Masking
- Transform Tool
- Grab Brush
First Details: Adding Ears
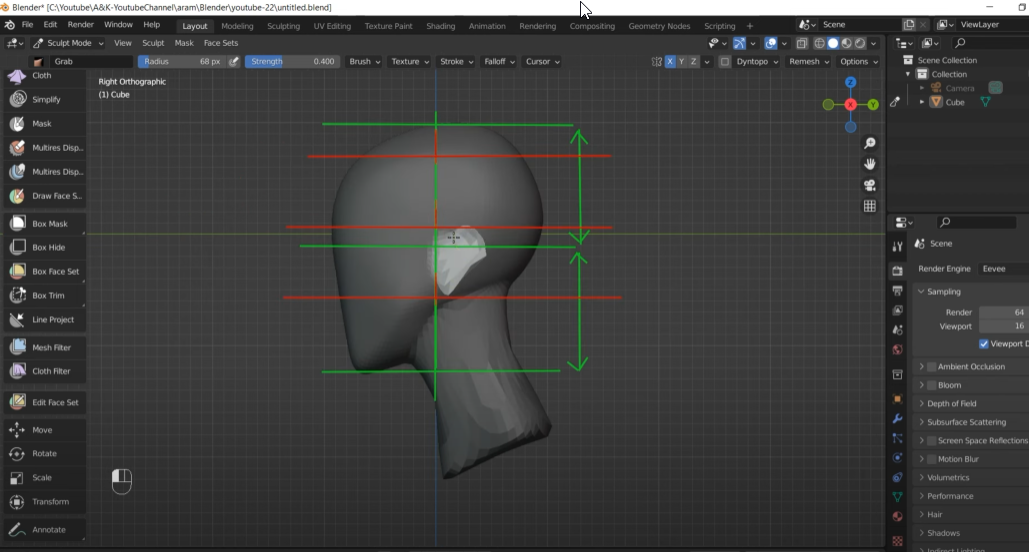
Now we are going to put the Ears on our model. Start with following the three outlines shown here. (the top of your head’s model, the bottom edge chin of your model, and the center of the head’s model).
Position the ear to the side of the head where the center line is located. You have the option of changing the shape of the ear in this step.
Tools Used:
- Annotation Line
- Masking and Unmasking
- Grab Brush
Punching In The Eyes

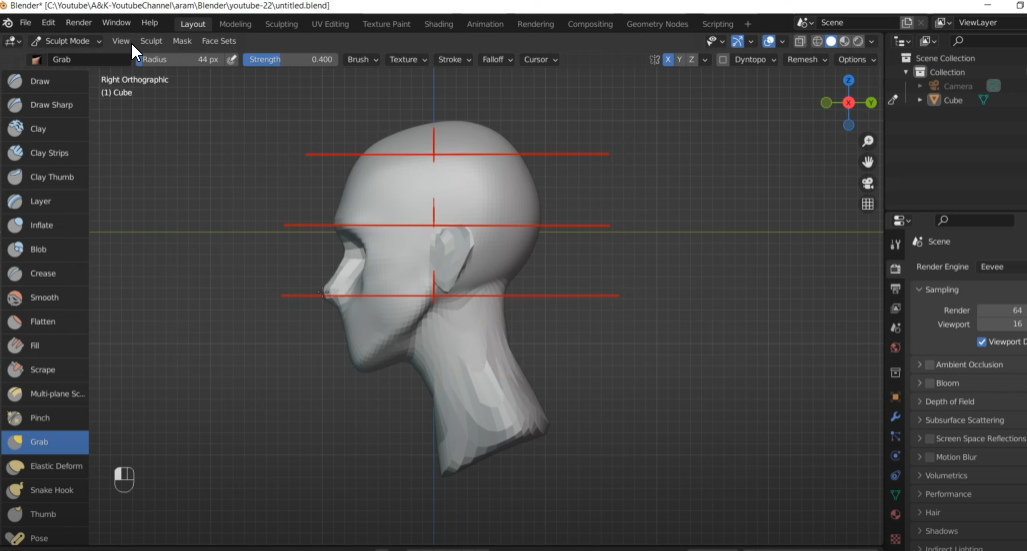
For the Eyes, we don’t have to do anything complicated here. Simply place where the eye sockets should be placed according to the grid we’ve been using.
If you are eager to make the model stand out more, you can put emotion with the eye sockets, although we are just making a basic head model here. Make it angry, laughing hard or captivating.
The choice is yours. That is why I told you earlier that this method will give you more freedom to be creative compared to starting with other kinds of mesh form.
Tools Used:
- Annotation Line
- Draw Brush
- Grab Brush
- Smooth Brush
Pulling Out That Nose
You have the eyes formed into your head’s model. Now’s the perfect time to create the model’s nose. This is by far the easiest part here since the nose ridge is already formed due to the application of eye sockets in the model.
Tools Used:
- Annotation Line
- Draw Brush
- Grab Brush
- Smooth Brush
Making That Jaw Pop
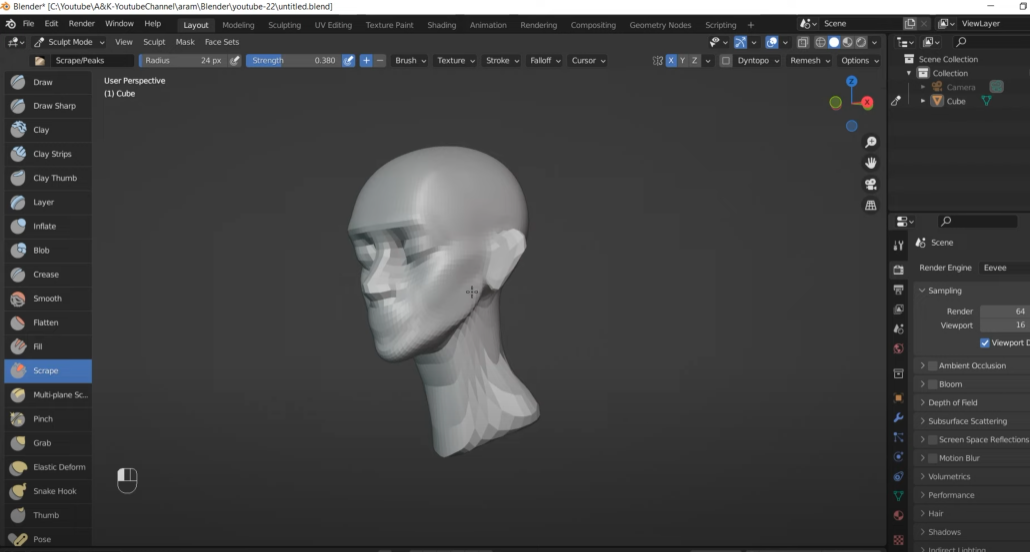
Start by adding depths to the cheeks and details to the jawline. This process is where you put distinction into your model head. Is the model you are creating a male or a female, younger, old, slim or strong?
This is where you are going to create your sculptures identity. Feel free to browse the internet for reference photos to gain more ideas on how to make it look like a female or a male by putting emphasis on details for the cheek and jawline.
Tools Used:
- Draw Brush
- Smooth Brush
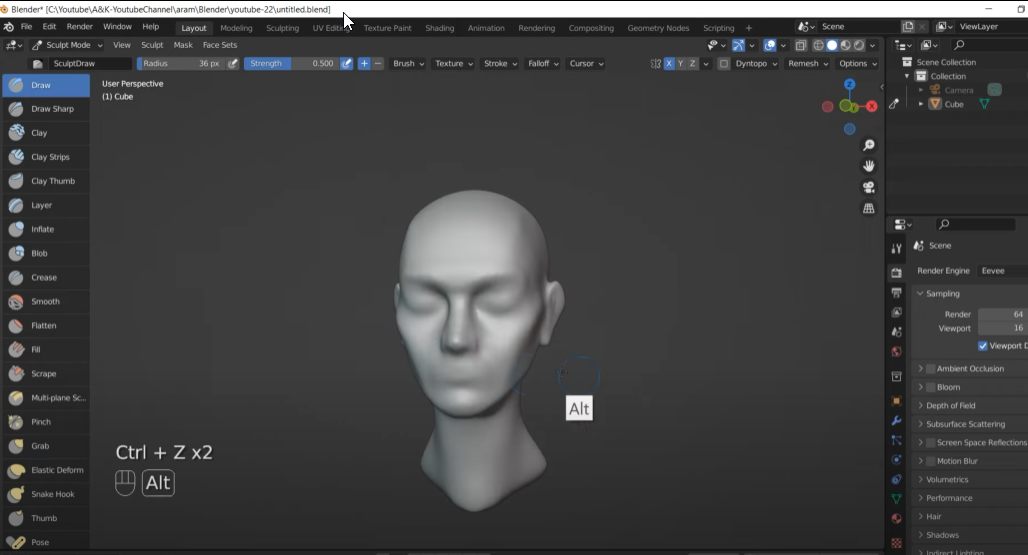
Finally, Adding Emotion To The Mouth

Finally, time to make your model feel alive by adding the mouth to your sculpture model. This will put the emotion you want for the model head. Is it going to be neutral, angry, happy, or sad?
Keep in mind that your head model’s mouth shape and figure should match the cheek and jaw structure..
Tools Used:
- Draw Brush
- Scrape Brush
- Smooth Brush
Finish With A Few Optional Touch-Ups, And You’re Done!
This is where you can play and add your style, add as many details as you like then, smoothen and polish. I’ts time to really explore the freedom that the sculpting tool can give you here.
You can adjust everything according to your preference and figure out how you want the whole structure of your head model should look.
This is also the best time to clearly see if all the details you put in your model match perfectly with your head structure.
Tools Used:
- Draw Brush
- Scrape Brush
- Smooth Brush
Ahead of the Pack
This concludes our guide on how to make a simple head in Blender™. I really hope that it does help your creative journey with Blender and get you started in creating amazing models by learning basics of the sculpting mesh.
Should you have any suggestions, comments, or questions, feel free to comment on the box below.