“So how does 3D modeling work, and what is it exactly?” If you’ve asked yourself this question at some point in time, then you’re probably just like me. I’ve wondered the same thing about 3D modeling myself, so I decided to look through the web for an answer, so you wouldn’t have to. Below Is the summarized version of what I found.
3D modeling is a process and a subset of Computer Aided Design (CAD) for creating a digital visual representation of any object or surface. It makes use of specialized computer software to create any 3D model, in which the object can be either inanimate or living.
If you’d like to know more about 3D modeling, how it works, what are some of the types of modeling, and which are the most common tools used in any modelling software, then continue reading along.
3D Modeling – Definition
To give a little more detail on the definition of the 3D modeling, there are a lot of explanations out there, however almost all of them converge on the same thing. 3D modeling is a process of 3D computer graphics, and it consists of developing a virtual mathematical representation of any physical object in three dimensions inside of simulated software, using a computer and specific modeling programs to assist with the creation.
While 3D CAD programs are frequently used in technical fields of engineering and architecture, 3D modeling can also be applied to the field of cinematography. Artists and designers create objects, creatures, and worlds three-dimensionally using software like Autodesk Maya or 3DS Max, which are used for generating animations and product visualizations.
Pretty much all of the animated movies use 3D design and modelling to create everything in it, from the worlds to every creature on screen. There are also some live action movies which make use of 3D modelling to include special effects and details into the scene, which wouldn’t have been possible to do without it.
3D modelling was developed for the first time in the 1960s by the creator of Sketchpad, Ivan Sutherland. The product of 3D modelling is called a 3D model, and models may be created either automatically or manually. 3D models are used for a variety of mediums including video games, movies, architecture, illustration, engineering, and commercial advertising. The 3D modeling process produces a digital object capable of being fully animated, making it an essential process for character animation and special effects.
3D Modeling – How does it work?
An outline of the technology and processes that enable 3D software
In order to better understand how the 3D modelling and its software technology works, I did research on the topic and found a lot of information on how it works. I will try to condense it in this article, taking into account that a lot of information comes from sites a bit more specialized on the subject.
3D modeling software is a class of 3D computer graphics software used to produce 3D models. Individual programs of this class are called modeling applications or modelers. A 3D modeler uses special software to manipulate points in virtual space(called vertices) to form a mesh: a collection of vertices that form an object.
The core of a model is the mesh which is best described as a collection of points in space. These points are mapped into a 3D grid and joined together as polygonal shapes, usually triangles or quads. Each point or vertex has its own position on the grid and by combining these points into shapes, the surface of an object is created.
The object can be created from simple shapes all the way up to complex high-polygon models. A polygon is one triangle, and It takes many triangles to make a circle or complex object. These 3D objects can be generated automatically or created manually by deforming the mesh, or otherwise manipulating vertices.
Models may also be created automatically with the help of a 3D scanner, or manually by a 3D modeler. The manual modeling process of preparing geometric data for 3D computer graphics is similar to plastic arts such as sculpting.
Models are often exported to other software for use in games or movies. But some 3D modeling programs allow the creation of a 2D images using a process called 3D rendering. This technique is fantastic for creating hyper-realistic scenes using sophisticated lighting algorithms.
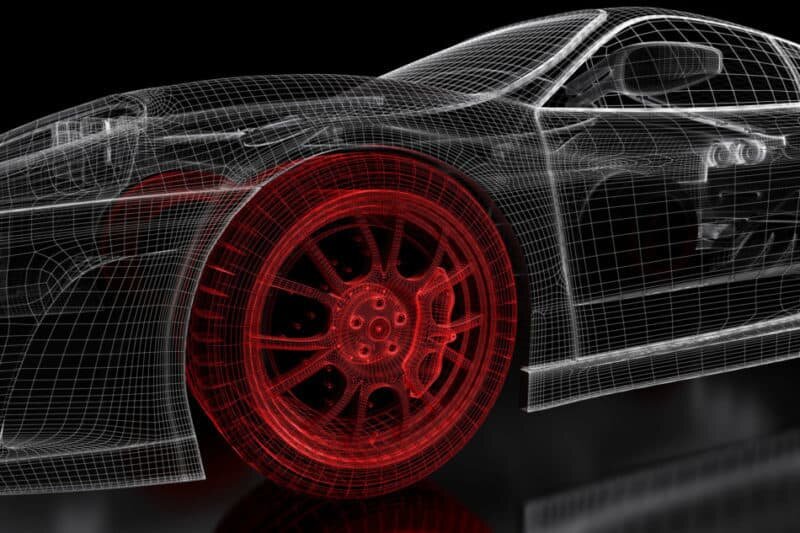
A 3D development can easily view object dimensions and their relationships in 3D space. This will help visualize space, movement, access, etc. It is possible to use 3D models to create 2D drawings directly. The process through which the 3D object or set of objects is/are displayed as a two-dimensional image is called 3D rendering.

Someone who works with 3D models may be referred to as a 3D artist. The best 3D art is developed by 3D artists who read anatomy very well and knows how sculptures look structurally. The 3D artist presents art in a hierarchy of structure so it can give a realistic and multidimensional view of the model or art.
Kinds of 3D modelling styles
There are a few types of 3D modelling with which the 3D artists work. Two of them are hard surface and organic modelling, and both of them are at their core still polygonal modelling. I will explain a bit about the differences between them both.
So in essence, the difference between organic and hard surface modelling resides on the type of model that is being designed. Organic modelling refers to the creation of 3D models based on living creatures such as people or animals. Whereas hard surface modelling focuses mainly on inorganic objects such as buildings or furniture.
Organic Modelling
Although there is some debate around organic modelling, organic models are generally accepted as being models of living things. An organic model is defined as a 3D model that represents a living creature. These range from trees and plants to animals and people. Organic models are also typically used in animation.
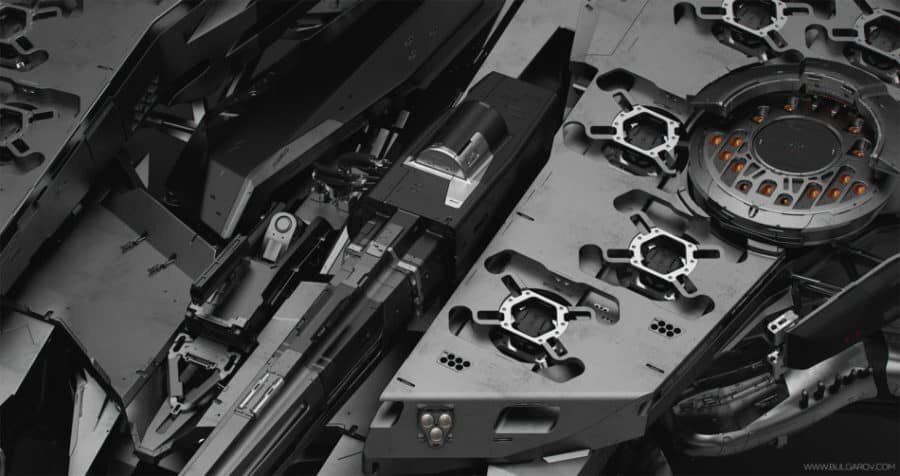
Hard Surface Modelling
As far as Hard surface modelling goes, it can be a little more forgiving than organic modelling. Due to the fact they are usually static objects, the type of polygons you end up using are not as important as long as the final product looks good.
Hard surface modelling is usually where people start with 3D art to get used to the workflow of any chosen software and how polygons work together. Flat edges are generally easier to model than a face with many curves and creases.
If you’ve been inspired by some of the content you’ve seen so far, i have written a whole post about how hard it is to actually learn modelling.
Check it out here.
The most common tools used in any modelling software
In order to start modelling in any given software, it is important to mention some importance components of 3D design software reference geometries. These include planes, axes, and points that can be used to locate the object and its characteristics in 3D space. All files start out with the base reference geometries centered around the origin or “zero-point”. However, it is also possible to create new planes, axes and points elsewhere in the 3D model.
While looking on the internet for the most common tools used in any modelling software, I found an article in instructables.com which helps to know what are the kinds of functions available to perform within any sketch. The tools are detailed below:
- Spline: A smooth line that will curve and adapt to intercept multiple defined points in the sketch and maintain its continuity.
- Offset: Creates a similar feature to the selected entity that is offset by a given distance from the selection (if the selection is a closed loop, it will offset the entire loop outside or inside the selection)
- Fillet: Rounds selected corners with a given radius
- Trim: Trims a line down to the nearest endpoint
- Extend: Extends a line to the next endpoint
- Mirror: Reflects the selected sketch entity across a given line
- Rectangular Pattern: Repeats selected entities a given number of times in rows and/or columns.
- Circular Pattern: Repeats selected entities radially around a center point.
- Project/Convert: Projects the silhouettes or edges of selected geometries or faces outside of the sketch into lines on the sketch plane.
- Construction Lines: Converts selected lines into “construction lines”, meaning that they can be used for alignment or guiding sketches, but are not a part of the “real” sketch (They don’t interfere with closed loops or extruded features)
A day in the life of a 3D modeler
3D modeling is a vital element for a lot of creative careers. Engineers and architects use it to plan and design their work. Whereas game designers and 3D animators rely on 3D modeling to bring their ideas to life. Also, about almost all of the Hollywood hit movies use 3D modelling for special effects, which helps to reduce cost and complete the movie production faster.
Usually the day of a 3D modeler artist starts by creating some type of primitive like a cube, sphere, or plane. This is just the starting point or shape to begin modeling. What the artist will do next is build upon the basic shape and manipulate it using different modeling techniques and tools. Most of the time is usually a good idea to start simple and the work building towards the more complex tasks/shapes.
The workflow for 3D modeling is a precise one, which usually involves the placement of meticulous individual vertices to accomplish the correct contours for the wanted object or model. If more detail is needed, the exterior of the mesh – which is made of polygons – can be subdivided into smaller shapes in order to create additional details. If the 3D model will be animated, then these kinds of subdivisions are essential. Any joints that need to bend will need these additional polygons to guarantee their smooth motion.
There are a lot of tools which speed up the modeling process. Most of the modeling software include an option for mirroring technique, which allows for the artist to construct a symmetrical model by working only on one half of the model. This type of tool is particularly useful in character design as then the artists need only model one side of the character, and the software will mirror their work in their selected axis, creating a symmetrically perfect model.
Of course there are other tools, which allow for a fast deformation of the surface for any model. For example, a noise texture could help to displace the mesh in order to get a more organic surface.
Another example would be that the subdivision surface tool could be used to simulate a higher polygon count. By doing so, the artist can work without “destructing” the work already done, in a process that keeps their original work. This helps with more complex models which require experimentation to correctly complete. Once the model is complete, it can then be painted and texturized.
Why is 3D modelling used?
3D visualizations are the best way of representing creative ideas from various fields and industries. Before the appearance of the first visualization software, people used to draw 3D visualizations manually, using vanishing points, which is difficult and requires a lot of time and knowledge.
The appearance of the first 3D modeling and rendering software changed the game and gradually made the job of architects and designers easier. Besides, the advanced features of available 3D rendering programs affected almost all industries worldwide.
Nowadays, working in some industries is unimaginable without the latest features of the best 3D modeling and rendering programs. Simple use, reduced working process, advanced and improved features, and incredible accessibility and availability are just some of the benefits of such software.
Some of the industries where 3D is heavily used, to name a few:
- Film/TV – Used to create CGI characters, objects, environments, animations and titling for movies and commercials
- Video Game Development – Used to create the entire visual 3D component of the game
- Architecture – Used to create interactive renderings of buildings and structures
- Engineering – Creation of to-scale designs to then be produced in a CNC environment
Best practices to improve as a 3D modeler
In an article written by Jonathan Lampel for cgcookie.com, he describes 6 principles of great 3D modeling. Although he focuses mainly on Blender when describing or writing about the steps, he mentions that these rules are universal to any 3D software, because there are a few key concepts applicable to any project which will directly improve results. I consider these steps as ways to improve as a 3D modeler.
I summarized the 6 steps below as a quick reference for any person who is looking for best practices to follow, which will help them to improve their work as a 3D modeler overall, and help to avoid some of the nuisances that can usually happen when working on any given new work or project.
- Form: when modelling, It is important to think about the overall shape of what you want to create first. Sometimes there are some shapes that are just hard to put together, however it’s good to keep in mind that those complex shapes are always combinations of more simple shapes.
Next is to identify the most defining features of the model you want to create and outline those first. This will let you adjust the form to get it right before it has too much geometry and then suddenly becomes difficult to manage. Focus on the big picture first
- Detail: once you’ve got the overall form complete then it’s time to make the object get to the next level using detail. It is very important to know exactly how much level of detail and what kind to make. You want a good mix between areas of big, medium and small details. To accomplish this, work in passes. First make all of the big things, then every medium one, and finally work on the small things.
- Scale: Try as much as possible to model to real-world scale. The size of your model makes a lot of subtle differences, mostly in interaction with other objects or when exporting to other programs. But if you also try to do this on every project you work, it forces you to be consistent.
The second thing about scale is the proportion, as this is the most common mistake artists make, by making the objects the wrong size relative to other things/objects. The countermeasure to this, is by always using a reference. Make sure to get right the length, width, height and thickness of the individual pieces that make the object or model.
- Adaptation: Objects and meshes should be easily modifiable. There is a term called “non-destructive” modeling, and its basis is to keep modeling in a way that keeps things as easily changeable as possible; you can manage this by keeping the mesh really simple, and just using modifiers to add complexity.
The second part of keeping something changeable is making sure that it can easily change over time when animated. This means that your mesh needs to be easily adaptable to design changes and animation.
- Reuse: To maximize efficiency, reuse as much of your mesh as you possibly can. This could be done by either using a mirror or and array modifier to make an instance instead of duplicating, or even making a duplicate and altering the existing object instead of starting again from scratch. This will allow for you to make things that have a lot of detail, and only a fraction of the work and time is needed.
- Surface: This refers to how your object actually looks when rendered. Because of the way rendering works, the biggest factor that impacts how light interacts with the surface of your object, is exactly how you model it. Be on the lookout for imperfections on the surface, like bumps, pinches, and warped areas, which could greatly impact your final result. Pay attention to surface quality.
I will keep linking to Flipped Normals content as they provide great insights and i really like the products on their site.
Check out this other article i wrote, reviewing some of their stuff.